
We continue making furniture items out of beads. Today we will make a table.
Materials required:
- size 8 seed beads of two colors (I used seed beads of yellow and orange colors);
- a piece of wire 0.3 mm thick and 110 cm long.
To make a table we will use the same technique as we’ve used before for the beaded chair.
Start weaving and string 4 yellow beads on the wire. Place the set of beads approximately on the middle of the wire.

Hold two beads at one end of the wire and cross the other end of the wire through these beads.

Tighten the wire carefully so that one of its ends is 10-15 cm longer than the other. As a result we've got first two rows of beads.

Then string 7 orange beads on any end of the wire

and cross the other end of the wire through these beads.

Tighten the wire carefully placing this third row so that it forms a circle over the first row.

Again string 7 orange beads on any end of the wire and cross the other end of the wire through these beads.

Tighten the wire carefully placing the fourth row under the second row. As a result the third and the the fourth rows of beads have formed a circle around the first two rows. Consider these two last rows of beads as the first circle around the centre.

Continue beading in the similar manner so that each two rows of beads form a new circle around the same centre.
The each half of the second circle consists of 11 yellow beads.
At first make one half of the circle


and then make another half of the circle.


The each half of the third circle consists of 17 orange beads.


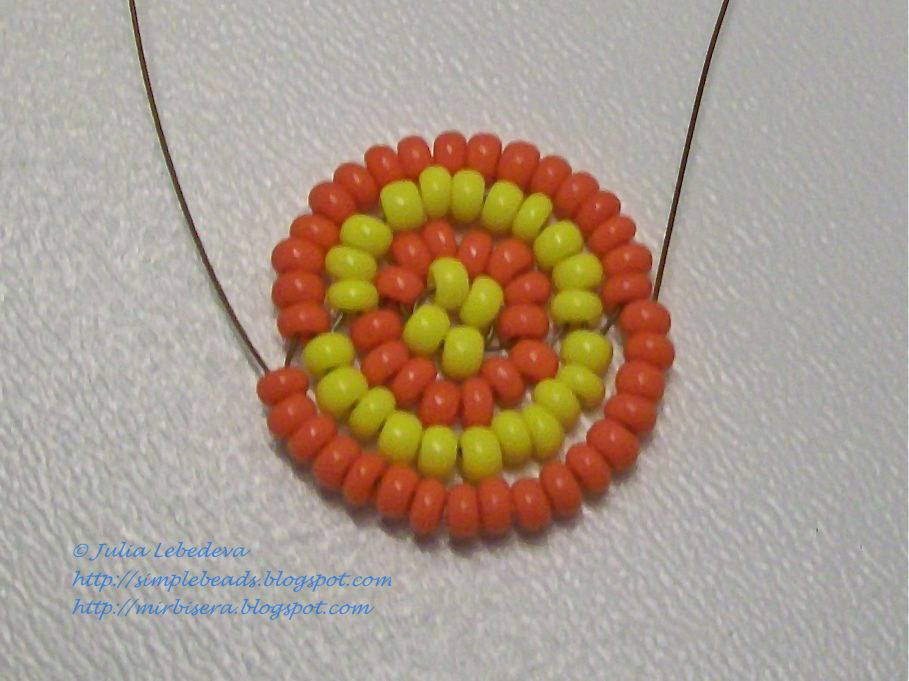
The each half of the fourth circle consists of 21 yellow beads.


Next, make the last circle with table-legs.
Choose the longer end of the wire and string 14 orange, 16 yellow and 1 more orange beads on it.

Hold the last orange bead and pass this end of the wire backwards through all the yellow beads.

Tighten the wire carefully, moving all the beads close to the beadwork. As a result the beads have formed a yellow needle that is a table-leg.

Then string 14 orange, 16 yellow and 1 more orange beads on the same end of the wire.

Again, hold the last orange bead and pass the wire backwards through all the yellow beads.

Tighten the wire carefully moving all the beads close to the beadwork and getting one more yellow needle (the second table-leg).

Now cross the other end of the wire through 28 orange beads from the last two sets that are situated on one line.

Tighten the wire carefully. As a result we've got the half of the last circle together with two table-legs.

Now take the end of the wire that goes from the table-leg and put 14 orange, 16 yellow and 1 more orange beads on it.

Hold the last orange bead and pass this end of the wire backwards through all the yellow beads. Then tighten the wire carefully moving all the beads close to the beadwork and getting the third table-leg.


Next, take the other end of the wire and string 16 yellow and 1 orange beads on it.

As usual, hold the last orange bead and pass this end of the wire backwards through all the yellow beads.

Tighten the wire carefully moving all the beads close to the beadwork and getting the fourth table-leg.

Now we should form the last sector of the circle. So, string on the same end of the wire the quantity of orange beads required to fill in the last sector. This quantity should be defined at the place so that the beads don’t bristle but lie closely to the previous circle. To fulfill this, place the last non-fastened set of orange beads (the set that was formed before the third table-leg) close to the table circles and string the required amount of orange beads on the wire filling the gap between the third and the fourth table-legs.

As for my table, it requires 12 beads.

Now twist together both ends of the wire

and trim the wire leaving a small tip.

Then give a shape to the table, bending table-legs at a normal-angle to the tabletop. After that hide the wire tip under the tabletop.
The beaded table is finished!

You can use this table together with beaded chairs and make a composition just like this one:

P.S. Don't want to miss new tutorials? Subscribe for email notifications of site updates!
If you like this tutorial, share it with your friends on social networks using the buttons below the post.
No comments:
Post a Comment